
INFO
Dokumentasi Bahasa Indonesia akan segera tersedia, kamu dapat membantu kami menyusun dokumentasi disini.
Usage
Create Your First CRUD
Go to /generators/create if yo're using Full Version
And /simple-generators/create for Simple Version
Below is table about supported input type & validation when you are using some column type.
| Column Type | Input Type | Validation |
|---|---|---|
string | text textarea email telephone password url search file hidden | required string min max |
boolean | radio select datalist | required boolean |
char | text color week email telephone password url search file hidden | required string min max |
date | date month | required date |
time | time | required date |
year foreignId | select datalist | required numeric |
dateTime | datetime-local | required date |
float decimal double | number range hidden | required numeric |
enum | select radio datalist | required in |
integer tinyInteger mediumInteger bigInteger | number range hidden | required numeric |
text tinyText mediumText longText | text textarea email telephone password url search file hidden | required string min max |
INFO
required validation will change to nullable if you uncheck required switch in the form, if any input type password will automatically added confirmed validation, min:1|max:100 for supported length column and email|unique for email input type.
INFO
After creating the new module, the 404 error may show, if this occurs, simply refresh the browser.
Create a Relation

Currently, only One To Many (Inverse) / Belongs To relationships are supported. There are specific rules you must follow to create a relation:
- Field name:
- Must be the table name but in singular +
_id, eg: if we have auserstable then it must be auser_id.
- Must be the table name but in singular +
- Column Type:
- Change to
foreignId. - For constrain or related model name, you can fill with Model name (automatically change to plural).
- Action on update & delete:
- On update:
nothing,cascade,restrict. - On delete:
nothing,cascade,restrict,null.
- On update:
- Change to
WARNING
Ensure that the related table and model already exist. If they don't, attempting to display or use them in a <select> or <datalist> will result in an error. By default, the id field is chosen to appear in the dropdown or autocomplete list, while the selected field typically corresponds to the second column in the relevant table.
Create an Upload File

Set the column type to string, the input type to file, and select the file type (currently only supporting images). Fill in the max size, and the default value is optional (must be a valid link).
We use Intervention Image for manipulating uploaded images. All settings for images are available in config/generator.php.
Install intervention/image if you want to use manipulation image.
composer require intervention/image-laravelDefault image configuration:
"image" => [
    /**
    * Path for store the image.
    *
    * Available options:
    * 1. public
    * 2. storage
    * 3. s3
    */
    "disk" => "storage",

    /**
    * Will used if image is nullable and default value is null.
    */
    "default" => "https://placehold.co/350?text=No+Image+available",

    /**
    * Crop the uploaded image using intervention image.
    */
    "crop" => true,

    /**
    * When set to true the uploaded image aspect ratio will still original.
    */
    "aspect_ratio" => true,

    /**
    * Crop image size.
    */
    "width" => 500,
    "height" => 500,
],
INFO
If you are using storage for store the image, make sure you run.
php artisan storage:linkOr if you are using s3 to store the image, make sure you read the documentation.
Create a Sidebar Menu

INFO
This feature only available in full version.
You can easily create a dynamic sidebar menu with just a few inputs. All sidebar menu configurations are placed in config/generator.php.
What if you don't need a dynamic sidebar menu and prefer to create your menu in .blade? No problem, we provide support for that too. Click here to learn how to do it.
Role & Permissions
When using the full version, creating a new module will automatically generate specific permissions and assign them to the admin role. All permissions are managed in config/permission.php.
Here an example:
[
    'group' => 'products',
    'access' => [
        'product view',
        'product create',
        'product edit',
        'product delete'
    ]
],
Create an API CRUD
- Execute the following command (skip this step if you are already installed)
php artisan install:api- Check if the
routes/api.phpfile is exists - Make sure there is
api: __DIR__ . '/../routes/api.php'inbootstrap/app.php
->withRouting(
    api: __DIR__ . '/../routes/api.php',
    web: __DIR__ . '/../routes/web.php',
    commands: __DIR__ . '/../routes/console.php',
    health: '/up',
)- If you want an authentication module, such as login and register, please execute the following command
php artisan generator:publish-apiFor the full version, navigate to /generators-api/create.
For the simple version, go to /simple-generators/create.
Then, follow the same steps you used to create CRUD operations above.
INFO
If you are using the API Generator in the full version, sidebar menu creation is not available.
Create an Export Excel File
Make sure you have installed Laravel Excel to enable the export feature.
composer require maatwebsite/excel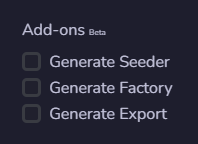
Refresh your page, and then you can check the Generate Export checkbox in the form.